
REVIEW · SALEM WITCH TRIALS AND HISTORY TOURS
Salem, MA: Witch City Broom Making Workshop
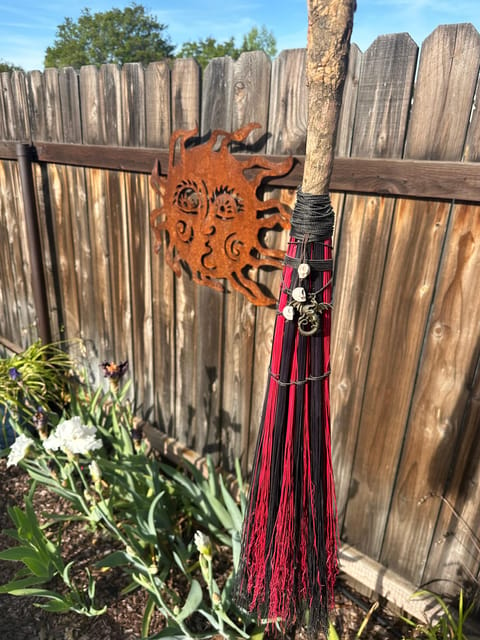
Salem hands you a broom, not a lecture. In this hands-on Witch City Broom Making Workshop, you design a custom witches broom souvenir with local Salem guides, choosing broomcorn colors, ribbons, and charms while they help with the wrapping. I love the choice you control, from your decorative details to the overall look. One thing to plan for: you must arrive early and stay on schedule, since they cannot accept latecomers and the meeting point is not at the Essex Street retail shop.
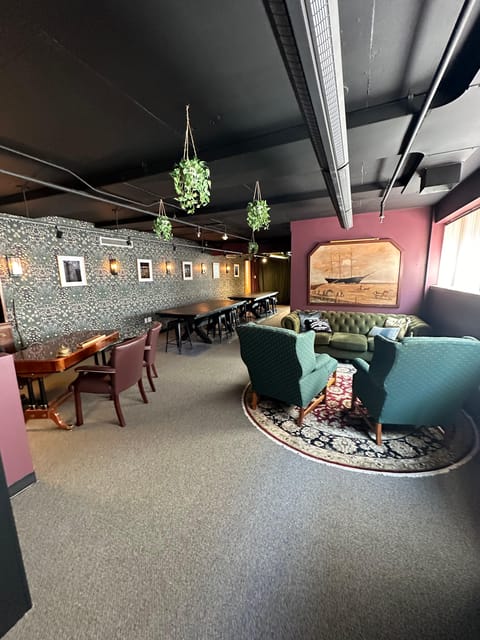
You’ll spend about 90 minutes crafting, decorating, and finishing your broom, which includes a broom handle, broomcorn, ribbon, and 1 to 2 decorations (plus color options). The workshop is tucked into the Old Town Hall area near the 3 staircases, and you’ll get clear step-by-step coaching so even if your creativity is rusty, you still leave with a broom you feel good displaying.
Why This Workshop Feels Like the Most Salem-Made Souvenir
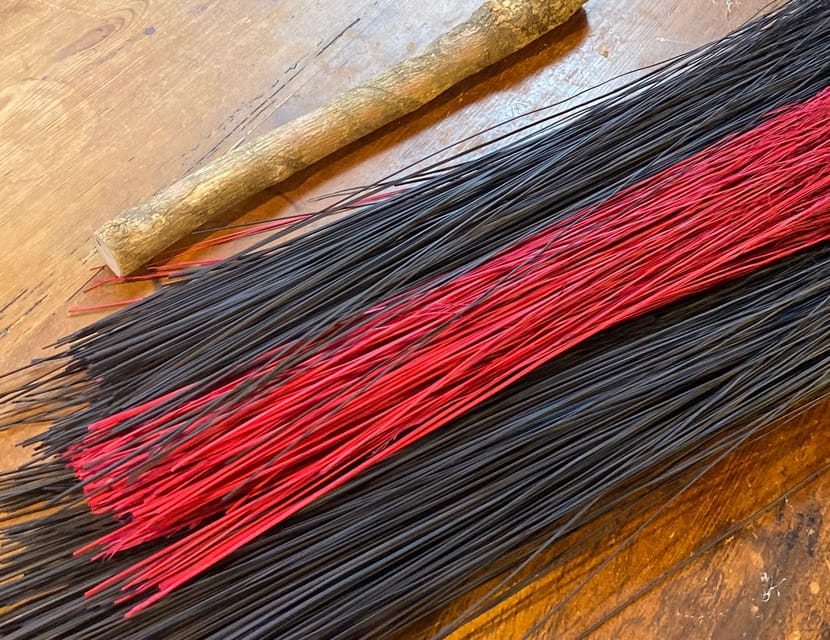
This is one of the few Salem activities where the souvenir is the point, not an afterthought. You’re not just buying something pre-made, you’re making a hanging broom you can bring home and actually use as decor, altar-style display, or a fun conversation piece.
The best part is how practical the instruction feels. Guides walk you through the “do this, then this” steps for wrapping the broomcorn and attaching your chosen charms and earthy elements. Then you make it personal with colors, ribbon, and accessories that match the vibe you want, whether that’s spooky-cute, elegant witchy, or very earthy.
More of 1692, told properly
Meeting Point and Timing: Old Town Hall, Not Essex Street
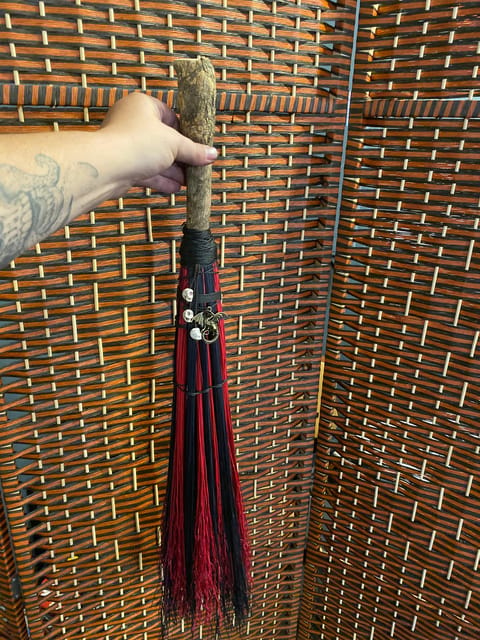
Plan to arrive with buffer. They explicitly say they cannot accept latecomers into the class, so give yourself time to find the Old Town Hall building near the 3 staircases.
Also note the location detail that trips people up: the workshop location is not at the Retail Store location on Essex Street. Your best bet is to rely on the stated meeting point and go there first, rather than trying to save time by stopping at the shop.
If you’re bringing someone along to watch, seating is limited to a small area for one or two guests. That means the workshop atmosphere stays calm and focused, but it also means you should not count on lots of extra space for spectators.
Your 90-Minute Broom Journey, Step by Step
This workshop is built to move at a craft pace, not a lecture pace. In about 90 minutes, you’ll go from bare materials to a finished witches broom you can proudly carry out.
Getting Started: Choose Your Look and Materials
You begin by gathering your materials. This is when you’ll make the key aesthetic decisions: broomcorn colors, ribbon choice, and the decorative elements you’ll attach. The structure matters because it keeps you from freezing at the table with too many options.
You also learn what each choice means in context. Some guides explain the meaning tied to colors and the idea of adding elements for protection, warding off negativity, or encouraging good fortune. Even if you treat it purely as a craft, those explanations help you choose with intention rather than random selection.
Crafting the Base: Wrap and Build the Broom
Next comes the heart of it: mastering the wrapping. The workshop teaches you how to wrap the broomcorn around the handle in a way that looks sturdy and intentional. The instructors help you as you go, so you’re not stuck trying to figure out the technique alone.
This is one of the most praised parts of the experience. Multiple people highlight that the guides are patient and guide you through the steps clearly, even when your hands are not naturally “craft hands.”
Other ways to cover Salem in a day

Decorating: Charms, Trinkets, Ribbons, and Personal Touches
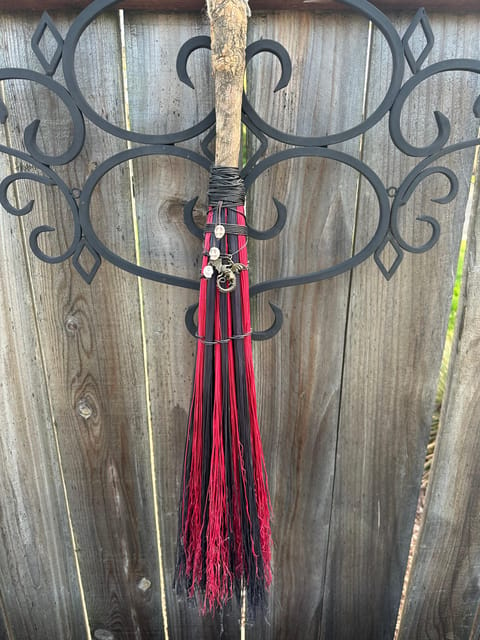
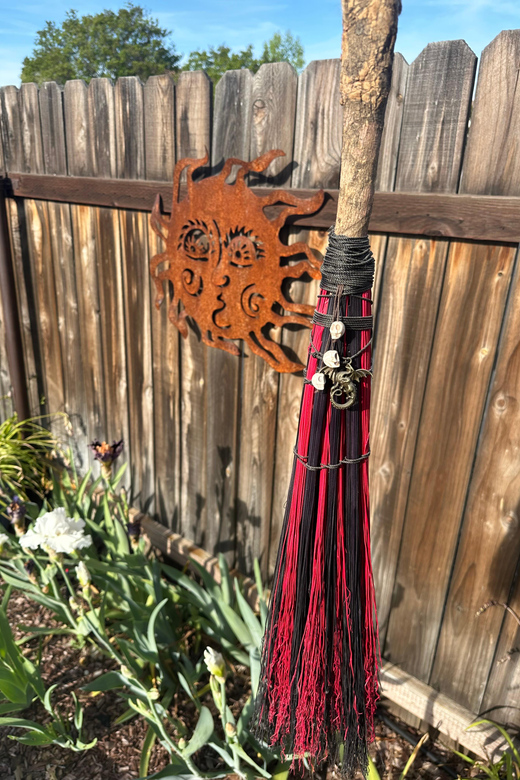
After the main build, you’ll attach decorations and finish with ribbons. The goal is your custom broom, not a uniform product. You can add trinkets and charms, plus colorful ribbons and broomcorn elements, so your broom looks like you made it, because you did.
If you’re the type who likes a plan, you can keep it simple: one main color theme plus ribbon. If you’re more expressive, you can layer on charms and decorative touches so it feels like a little spell in physical form.
A small heads-up based on what people experienced: some craft supply items can run out for later groups, so if there are specific elements you’re hoping to use, don’t wait too long to finalize your choices.
What You Actually Learn (Beyond the Final Look)
This workshop doesn’t just teach craft steps, it teaches a logic for how to personalize the broom. That’s why it feels more authentic than a typical souvenir factory.
How Guides Help You Make It Yours
Instructors like Mykaela, Ashley, Amy, Samantha, Makayla, and Haley show up in the feedback as standout guides. Common themes: clear instructions, helpful suggestions, and the kind of patience that turns first-time craft anxiety into finished-product pride.
Even if you’re not a super confident artist, the guidance helps you translate your idea into something that looks intentional. One of the best ways they do this is by offering style suggestions while you’re choosing colors and decorations.
The Meaning Behind Protection and Warding
The workshop teaches you how to attach charms and earthy elements for protection, warding off evil, or encouraging good luck. They also talk about the idea of repelling spells from others if that’s part of your personal intent.
You don’t have to treat it as literal magic to get value from this part. It gives you a narrative for your design. Instead of your broom being random decoration, it becomes your chosen symbolism in a Salem context.
Value and Price: What $135 Gets You in Real Terms
At $135 per person for about 90 minutes, this isn’t a bargain craft. But it can also be fair value when you look at what’s included and what you’re making.
You get a complete activity experience with guided instruction, not just a “here are materials” setup. Included items are a broom handle, broom corn, 1 to 2 decorations, ribbon, and color options. That means you’re not paying extra to hunt down supplies.
Also, multiple reviews mention that broom sticks can be handmade at a local farm, which supports the idea that the finished broom isn’t just flimsy craft stock. The end result is a real souvenir you can hang or display, not a small token.
One small drawback that comes up in feedback: a few people felt it was a little pricey. If you’re the type who needs maximum quantity for your money, this might not feel like the best use of time. But if you want a hands-on Salem memory that’s actually yours, the price starts to look more justified.
Shipping and Packing: The Practical Salem Souvenir Problem
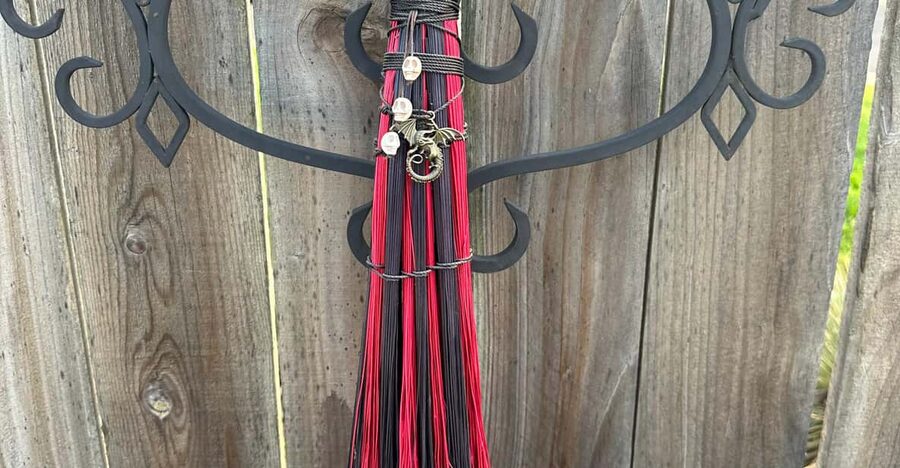
Brooms are fun, and brooms are also awkward to travel with. You’ll want a plan before you show up.
One key detail from feedback: they do not ship the broom for you. That means you’ll either need to pack it carefully for your trip or plan to ship it yourself.
People reported two helpful approaches:
- Bring a suitcase large enough to fit the broom diagonally, when you’re trying to carry it through travel.
- Use a nearby UPS store to ship it so you’re not trying to carry it through TSA.
If you’re flying, do yourself a favor and figure out your packing plan early. Decide whether this is going into checked luggage, packing carefully, or shipping after the workshop. That way, the craft time stays fun, not stressful.
Atmosphere, Accessibility, and Family Fit
The vibe matters here. People repeatedly mention a welcoming atmosphere and a relaxing, comfortable space. The workshop feels like a dedicated craft session rather than a rushed tourist stop.
Seating and Waiting Rules
Seating for extra guests is limited to one or two in a small area. And there’s an important rule for parents: children cannot be in the waiting area unattended. That’s meant to keep the workshop environment calm and respectful for everyone.
Stairs and Mobility Limits
The building is not wheelchair accessible. They also note that participation requires use of stairs to get into the workshop. Mobility scooters are not allowed, and the workshop is not suitable for wheelchair users.
What to Wear and What Not to Bring
You’ll want closed-toe shoes. They specifically do not allow sandals or flip flops. They also list no video recording, no smoking, and no intoxication, plus restrictions on electric wheelchairs, mobility equipment, handcarts, alcohol, and drugs.
So, this is a “show up ready to craft” experience. If you plan your outfit and arrive on time, the rest is smooth.
Who This Workshop Suits Best
This is a great match if you want an authentic Salem activity where your souvenir is made by your hands. It’s also ideal if you like guided creativity, because you’re not starting from scratch with no instruction.
I think it works especially well for:
- Couples or friends who want a shared hands-on memory
- Solo travelers who enjoy structured craft activities
- People who want witchy decor with actual personal choices
- Families where kids can stay engaged and parents handle the waiting area responsibly
A good sign: many people mention the class feels doable even for beginners, because the guides keep the steps clear and help as needed.
Should You Book? My Take
Book it if you want a Salem keepsake you can feel proud of. The combination of custom design choices, helpful instructors, and a finished broom you can display at home is exactly why this stands out. If you’re going to spend money on one witchy craft in Salem, this is the kind that becomes a lasting reminder, not a disposable trinket.
Skip it or think twice if your schedule is tight, because latecomers aren’t accepted. Also skip it if stairs or mobility limits are a problem for you, since the workshop is not wheelchair accessible.
If you’re prepared to arrive early, wear closed-toe shoes, and plan how you’ll transport your broom, this workshop is a very solid use of time in Salem.
FAQ
What is the duration of the Salem Witch City Broom Making Workshop?
The workshop lasts about 90 minutes.
Where do I meet for the class?
You meet at the Old Town Hall building near the 3 staircases.
Is the workshop at the Essex Street retail store?
No. The workshop location is not at the Retail Store location on Essex Street.
What is included in the workshop price?
The included items are a broom making workshop, 1 broom handle, broom corn, 1 to 2 decorations, ribbon, and color.
What should I bring, and what footwear is required?
You should wear closed-toe shoes. Sandals and flip flops are not allowed.
Is this workshop wheelchair accessible?
No. The building is not wheelchair accessible, and participation requires use of stairs. Wheelchair users are not suitable for this workshop.
Can I record the workshop or bring certain items?
Video recording is not allowed. The workshop also lists restrictions including no smoking, no intoxication, and no electric wheelchairs, handcarts, alcohol, or drugs. Unaccompanied minors are also not allowed.
More Ways Around Salem


More Tour Reviews in Salem






Salem, Still More to See
More around Salem, freshly written up
- Private Walking Salem Legends Tour Professional Guide★ 5.0 · 3 reviews
- Pirates and Privateers Walking Tour with Real Pirates Admission★ 4.5 · 3 reviews
- Salem: Spanish-Speaking Witch Trials Walking Tour★ 5.0 · 3 reviews
- Cemetery and Witchcraft Trials Tour★ 5.0 · 4 reviews
- The Ghost Walk. Tortured Souls of Salem★ 5.0 · 4 reviews
- [ESP] History of Salem Witch Trials★ 4.0 · 5 reviews
Salem Witch Trials and History Tours, compared.
 ★ 5.0History and Hauntings of Salem Guided Walking TourFrom $3614,564 reviews
 ★ 4.5Salem’s Best Ghost TourFrom $304,186 reviews
 ★ 5.0Salem Voodoo, Vampires, and Ghosts Guided Walking Tour1,931 reviews
 ★ 5.0Bewitched Walking Tour of SalemFrom $351,895 reviews
 ★ 5.0Satanic Salem Walking TourFrom $301,635 reviews
 ★ 5.0Mysteries and Murders of Salem Guided Night-Time Walking TourFrom $361,488 reviews
 ★ 4.5The Salem Witch WalkFrom $251,301 reviews
 ★ 5.0Wicked Awesome Tours: Witch Trial History and Salem Haunts!From $291,032 reviews
Also filed under